
Learning how to connect electrical wires safely requires understanding several key concepts. This guide covers wire color codes, necessary tools, and safety steps. You’ll learn proper wire stripping methods and connection techniques. We’ll also cover common problems you might face during wiring projects. For complex installations, consider consulting an experienced Greensboro electrical team.
Understanding Wire Color Codes
Wire color codes help you identify each wire’s purpose in electrical systems. Knowing how to connect electrical wires starts with recognizing that black wires carry electricity (hot), white wires return current (neutral), and green or bare copper wires provide grounding. These colors stay the same across most residential wiring projects. Following these standards prevents mistakes and keeps your home safe. When you see different colors, each one has a specific job that keeps electricity flowing properly.
Tools Required for Wiring Projects
Having the right tools makes electrical work safer and easier. Here are five basic tools you’ll need for most wiring projects:
- Wire Strippers: Used to strip insulation from wires without damaging the conductor.
- Needle-Nose Pliers: Handy for bending and twisting wires in tight spaces.
- Voltage Tester: Confirms that wires are not live before working on them.
- Screwdrivers: Required for securing wire connections in terminals.
- Wire Nut Connectors: Used for joining multiple wires securely.
These tools help you work safely and make solid connections that will last.
Safety Precautions to Remember
Safety comes first when dealing with electricity. Always turn off the power at the circuit breaker before touching any wires. Use tools with rubber handles to protect yourself from shocks. Wear safety glasses and work gloves to prevent injuries from sharp wire ends. Never work on electrical systems when your hands are wet or if you’re standing in water. Check twice that the power is off using a voltage tester before starting any work.
Proper Wire Stripping Techniques
Stripping wires correctly prevents damage and helps make good connections. Follow these steps for clean wire stripping:
- Use a Wire Stripper: Select the correct notch size on the wire stripper based on the wire gauge.
- Measure and Mark: Measure the insulation to be removed and mark the spot with a pencil.
- Strip with Precision: Place the wire in the stripper, ensuring it is flush against the cutting blades.
- Rotate and Pull: Rotate the wire stripper around the wire 2-3 times to score the insulation, then gently pull it off.
- Inspect for Damage: After stripping, inspect the wire for any nicks or damage before proceeding with the connection process.
Take your time with this step – rushing leads to damaged wires that won’t connect properly.
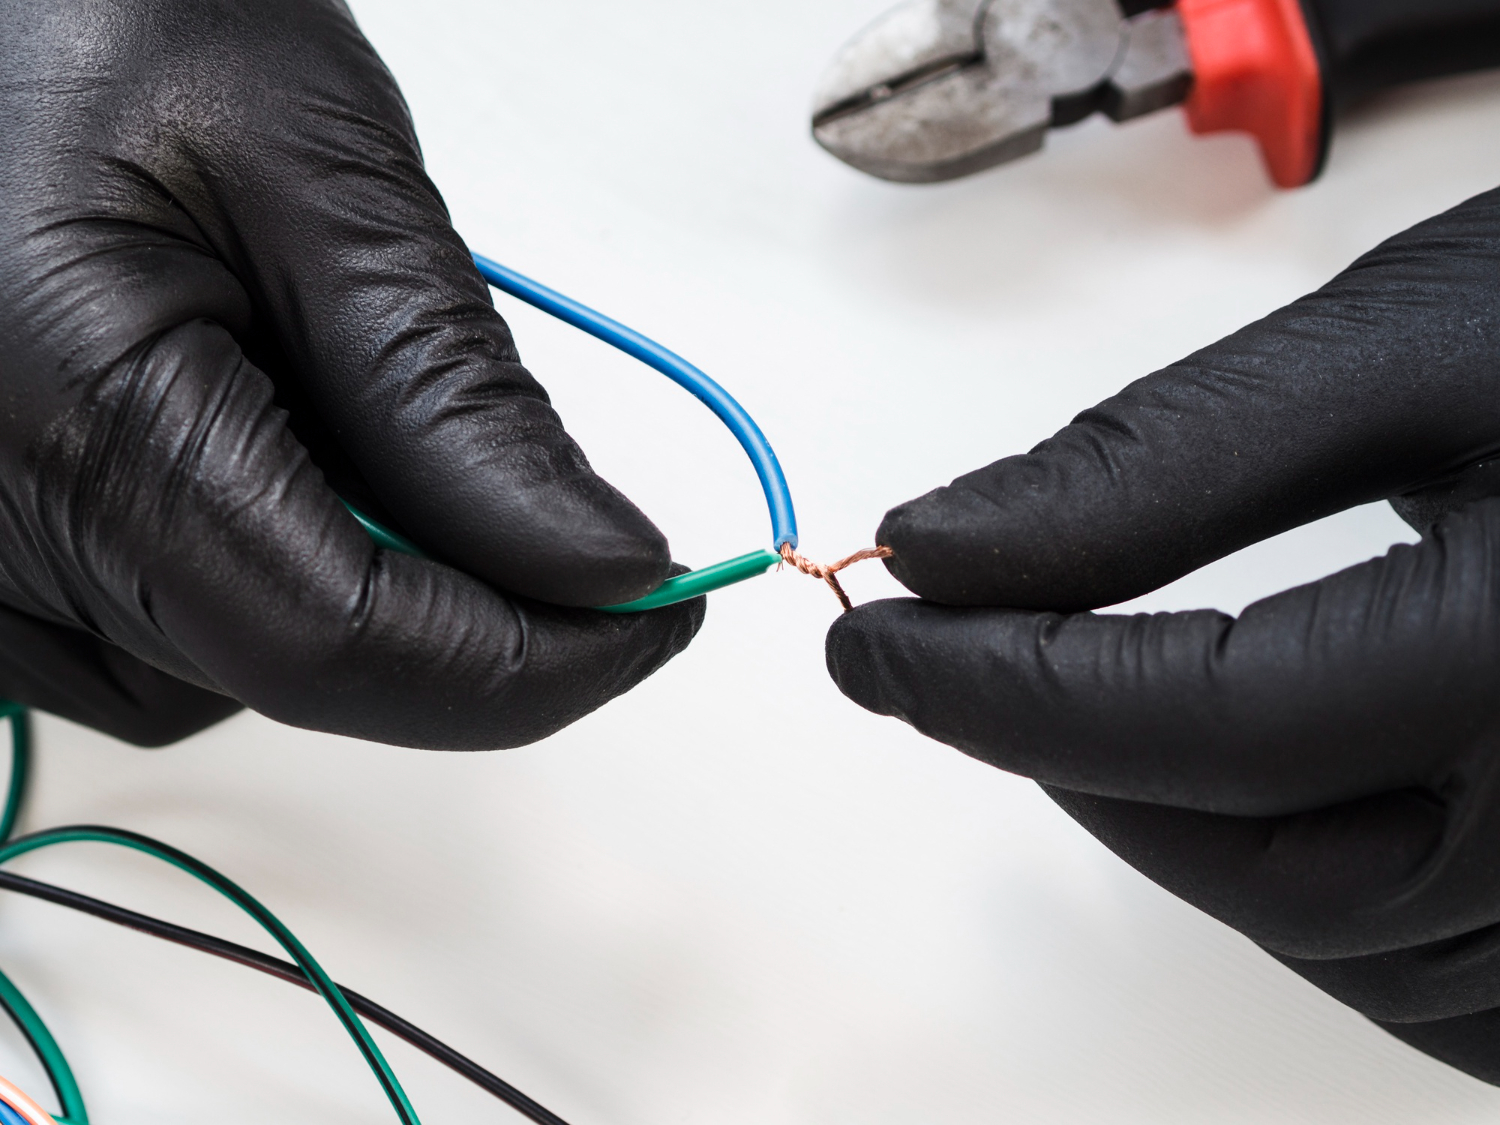
How to Connect Wires Correctly
Good wire connections start with clean, properly stripped wire ends. Remove about half an inch of insulation from each wire using your wire strippers. Twist the bare copper strands together tightly so no loose pieces stick out. Choose the right size wire nut for your connection – too small won’t hold properly, too large won’t grip the wires. Twist the wire nut clockwise until it’s snug, then wrap the connection with electrical tape for extra protection.
Troubleshooting Common Wiring Issues
When electrical connections don’t work right, follow these steps to find the problem:
- Check for Loose Connections: Tighten any loose connections to prevent overheating.
- Inspect for Damaged Insulation: Look for any frayed or damaged insulation that could lead to short circuits.
- Test Circuit Continuity: Use a multimeter to check for continuity along the circuit.
- Verify Proper Grounding: Make sure that all components are properly grounded to avoid electrical shocks.
- Look for Overloaded Circuits: Distribute the load evenly to prevent circuits from tripping.
Most electrical problems come from loose connections or damaged wires, so check these first before looking for more complex issues.
Related Topics: