

Knowing how to inspect your home’s electrical wiring can save you money and prevent dangerous situations. Understanding the basics of home electrical repair helps you identify problems before they become serious hazards. This guide walks you through the step-by-step process of checking your wiring safely and securely. You’ll learn what tools you need and how to inspect every part of your electrical system. With the right approach, you can identify issues and know when to seek professional help.
Gather Necessary Tools
Before inspecting your wiring, gather all the necessary tools. A digital multimeter accurately measures voltage, current, and resistance. You’ll also need a non-contact voltage tester to detect live wires without having to touch them. Insulated screwdrivers allow you to work safely on electrical components without risk of shock. A flashlight helps you see wiring in dark corners and tight spaces. Wire strippers are useful for removing insulation from wires. Keep a notebook and pen nearby to record your findings during the inspection.
Turn Off Power Supply
Always shut off the power before inspecting or working on any wiring. This step prevents electrical shocks and ensures your safety. Start by turning off the main power switch in your circuit breaker box. Use a non-contact voltage tester to confirm that the power is actually off, this device indicates if any current is still flowing through the wires. Once you’ve verified the power is off, you can safely begin your inspection. Never skip this step when dealing with electrical systems.
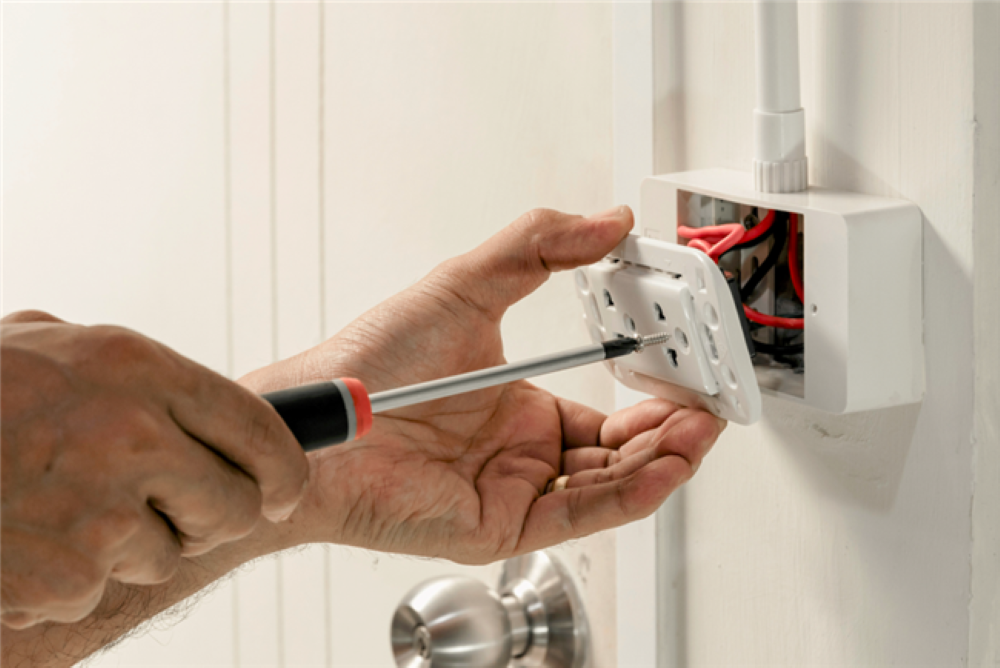
Inspect Electrical Outlets
Inspect each electrical outlet carefully for damage or issues. Inspect the outlet covers and plates for cracks, discoloration, or burn marks. Plug in a lamp or small device to make sure it fits securely without wobbling. Turn the device on and off to test that the power supply works consistently. Feel each outlet gently, if it’s warm or hot, something’s wrong underneath. Use your multimeter to measure the voltage coming from each outlet. If you spot any issues during this check, please contact a professional electrician for a more thorough inspection.
Check Light Fixtures
Light fixtures need regular inspection to stay safe and functional. Turn off the power to the fixture at your circuit breaker before you start. Inspect the fixture closely for signs of wear and tear, such as frayed wires or burn marks. Make sure you’re using the right wattage bulbs, the fixture should tell you what’s safe. Turn the power back on and test that the fixture works properly. If the light flickers or won’t turn on, the wiring might have a problem. Get a professional electrician to fix any issues you find right away.
Examine Circuit Breaker Panel
Your circuit breaker panel controls all the electricity in your home, so it needs careful attention. Inspect for any physical damage, such as burns, rust, or loose connections. Check that all breakers have clear labels showing which circuits they control. Flip each breaker off and then back on to make sure they work correctly. Look for any tripped breakers and determine the cause of the trip before resetting them. Regular panel inspections keep your electrical system safe and reliable.
Conduct Continuity Testing
Continuity testing checks if electricity can flow properly through your wiring. This test shows if there’s a complete path for current to travel through the circuit. Turn off power to the circuit you’re testing and disconnect it from the system. Set your multimeter to the continuity setting. Place one probe at one end of the wire and the other probe at the opposite end. If the multimeter beeps or shows a low resistance reading, the wire is good and electricity can flow through it. No beep or a high resistance reading indicates a break in the wire that requires further investigation.
Related Topics: